Our final assignment was to document a process or series of actions leading to the culmination of a goal….
Naturally, I decided to enlist the help of my very able-bodied husband (more on that later) and his special set of skills to help me document a basic skill. And not make it boring.
How could fire be boring?
How could anything be boring while looking at him?
How could anything that includes him, fire and flannel be anything less than titillating?
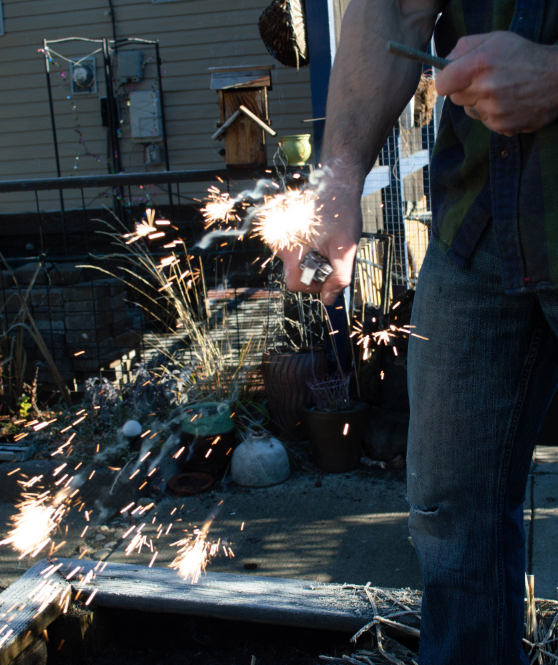
However, he did make me promise I would not photograph his face. Pity.
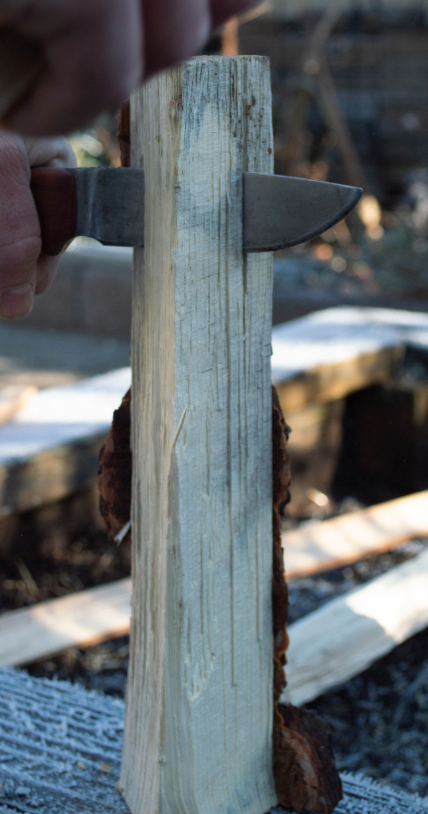
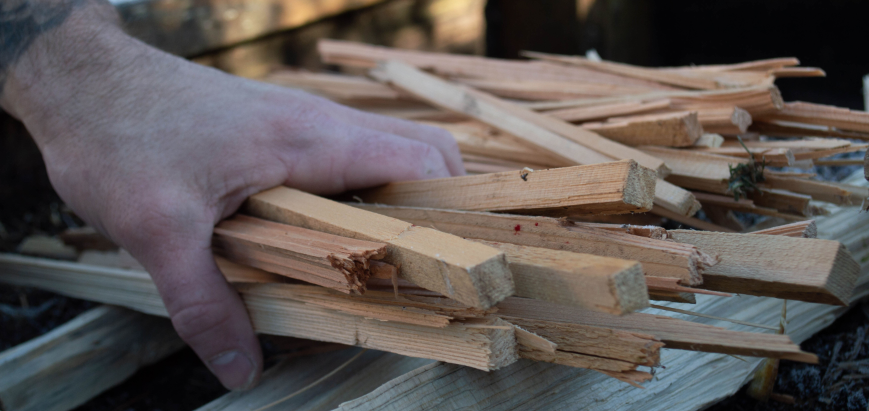
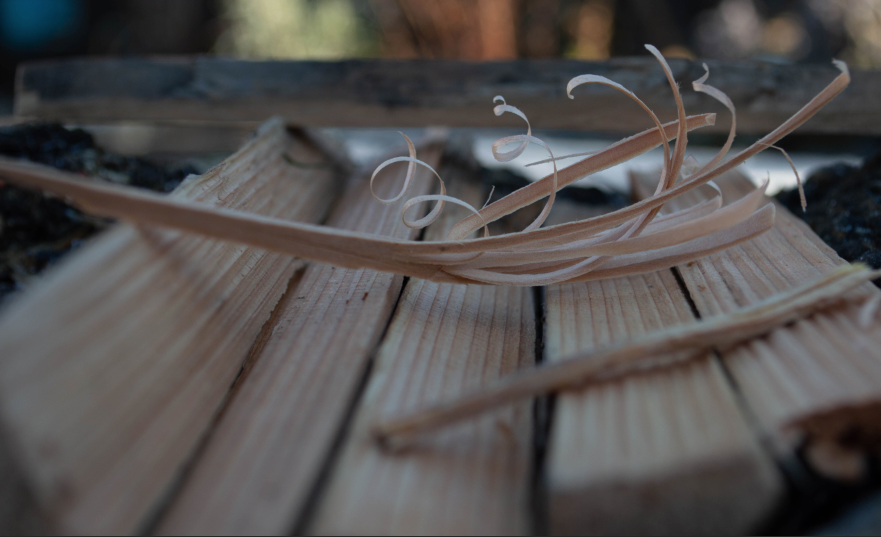
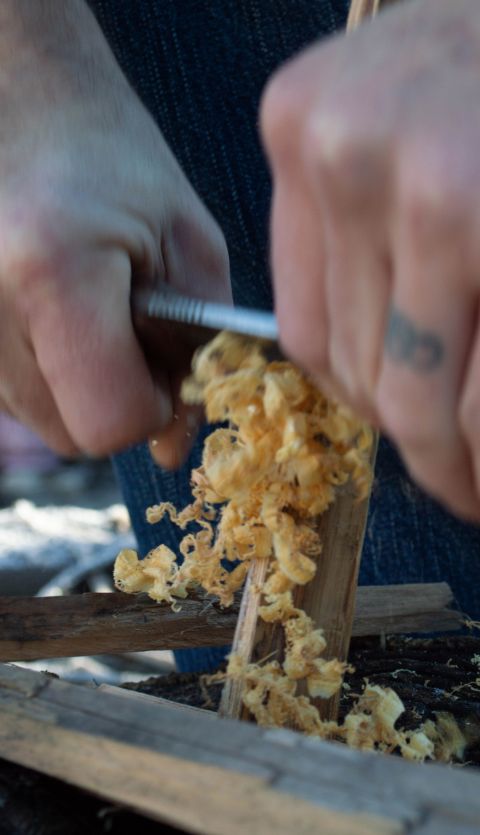
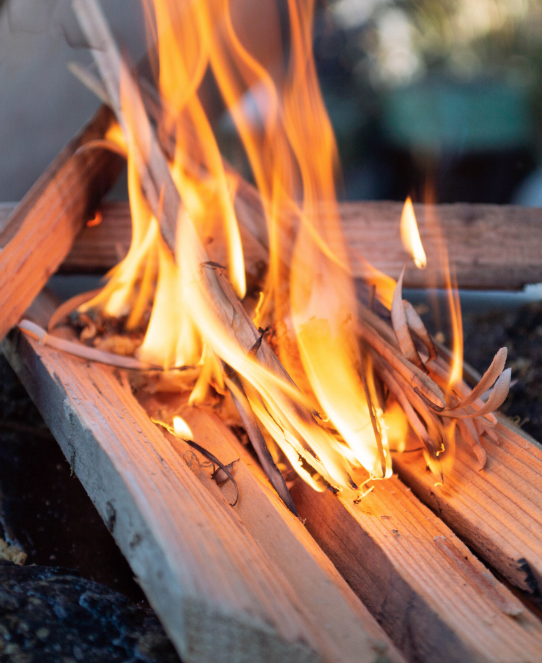
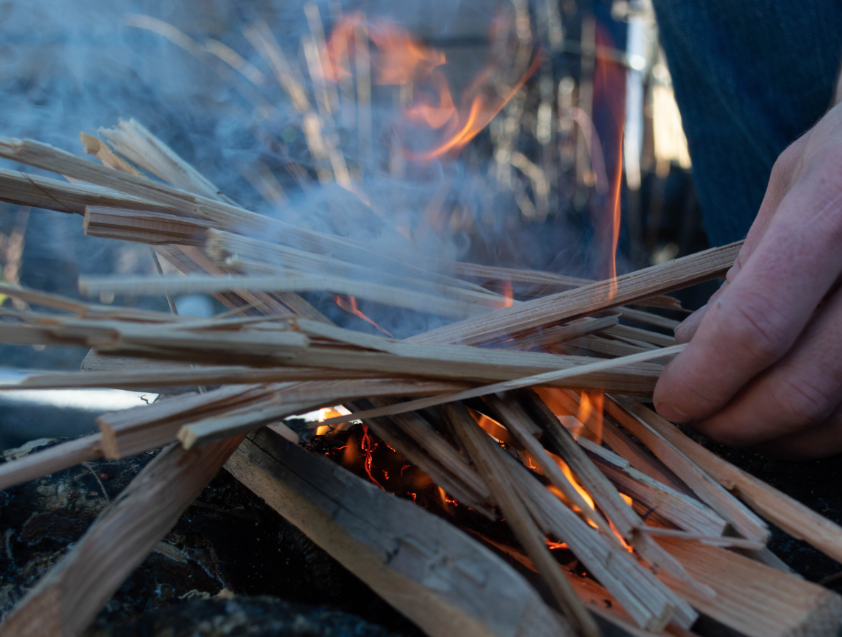
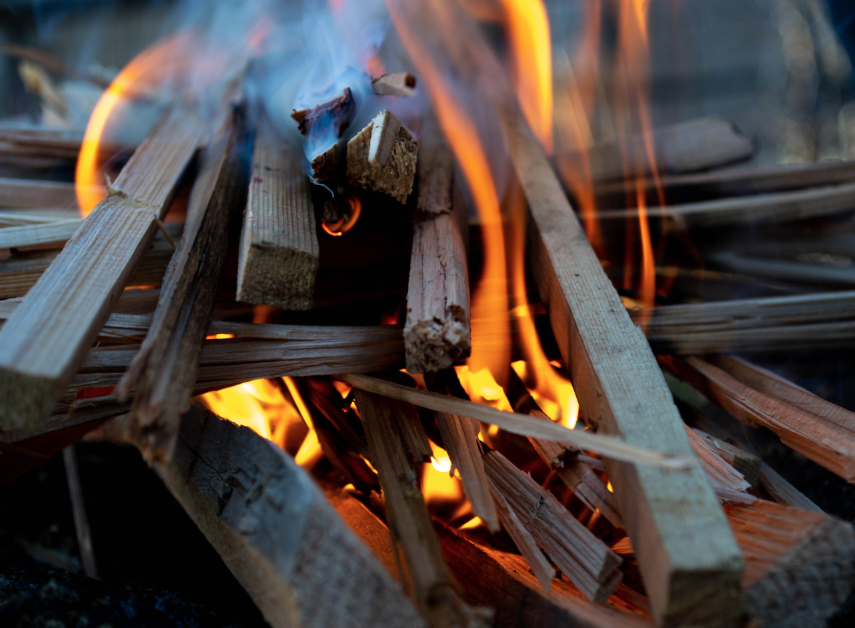
Step 1: Ensure you have a dry platform for all materials and a solid, dry base where to start your fire.Step 2: Begin cutting your wood down to manageable sizes. There are several stages to this process.Step 2a: Creating pencil and thumb-sized split wood using only a knife.Step 2b: Be certain to have a good lot of both pencil-sized (on the right) and thumb-sized (on the left) kindling. A good handful of each should suffice.Step 3: Creating feather sticks. These are an important step, a they ensure a good solid fire catch after the first spark. As the get bigger on the ends, they help grow the fire to be capable of handling the pencil and then thumb kindling.Step 3a: A perfect feather stick. You should have several.Step 4: Creating pitch wood shavings. This is your initial fuel. If you are so lucky to find pitch wood, this will make your fire building a breeze!Step 5: The striker is an essential tool for outdoorsmen. It enables easy, powerful sparks to light the pitch wood.Step 6: It only takes one spark, as Smokey the Bear says. Let the pitch shavings really catch hold of the flame.Step 7: Allow the flames to catch on the feathery tips of the feather sticks before placing them directly on the flames.Step 8: Once the feather sticks are good and burning, begin to add the pencil-thin kindling, taking care not to smother the fire or spread the fuels. Keep it tight and contained.Step 9: Being thin, the pencil kindling will catch quickly and create more intense heat for your future steps.Step 10: Once the pencil thin kindling is burning, add the thumb-sized kindling. Once again, keep everything tight and on your platform. The flames should already be several inches tall and crackling.Step 11: Once the smaller fuels are caught and burning well, you may begin to add the larger pieces, maintaining a tight grouping. Once you have a well-established fire you may begin to put larger or more green pieces of wood on but try and use the driest wood possible.
Here are some basic images and steps towards creating a fire. These concepts may be used for any camping/hunting fire or can be sped up and condensed for emergency purposes.
Remember that damp and cold are the main enemies of a fire. Once a fire has substantial heat, it is able to dry things, such as damp logs or branches. However, when battling against cold and wet, it’s much more difficult to start a fire.
One does not need many tools to accomplish this. If you have a small knife, then logically you would not try to cut large logs into smaller pieces. Finding or making a spark is the most challenging step if one does not carry matches.
My favorite part about this lesson is that it’s simple and my six year old daughter can do it. Whether she can actually remember everything is up for debate. However, we include her in this lesson every time we’re out camping. Someday it may serve her well!